Set Up For Product Photography
Set Up For Product Photography -
Shooting Perfect Product Photos | A Handy Guide for Beginners
Tips and Tricks to Achieve Perfect Product Shots

Are you planning to shoot some product photos? If you're just starting out, it can be quite challenging to achieve the perfect shots that really showcase the details, textures, and colors of your products. Luckily, there are some helpful tips and tricks that can help you along the way.
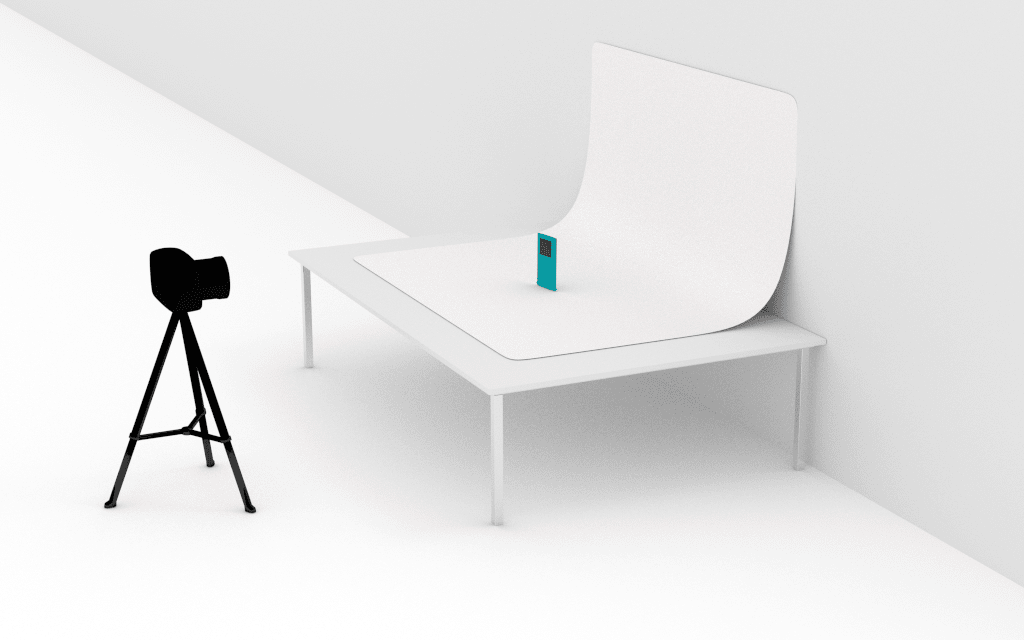
Firstly, you'll want to make sure you have the right equipment. This includes a camera with good resolution, a tripod, and lighting equipment or natural light. Secondly, you'll want to consider the setting and props for your product. This can include a clean and simple background, a model or mannequin to show how the product looks when worn or used, and relevant props to show the product in context.
Lastly, make sure to take multiple shots from different angles and distances. This will give you more options and allow you to choose the best shots to showcase your products.
How to set up a DIY desktop product photography table - YouTube
Step-by-Step Guide to Building Your Own Product Photography Table
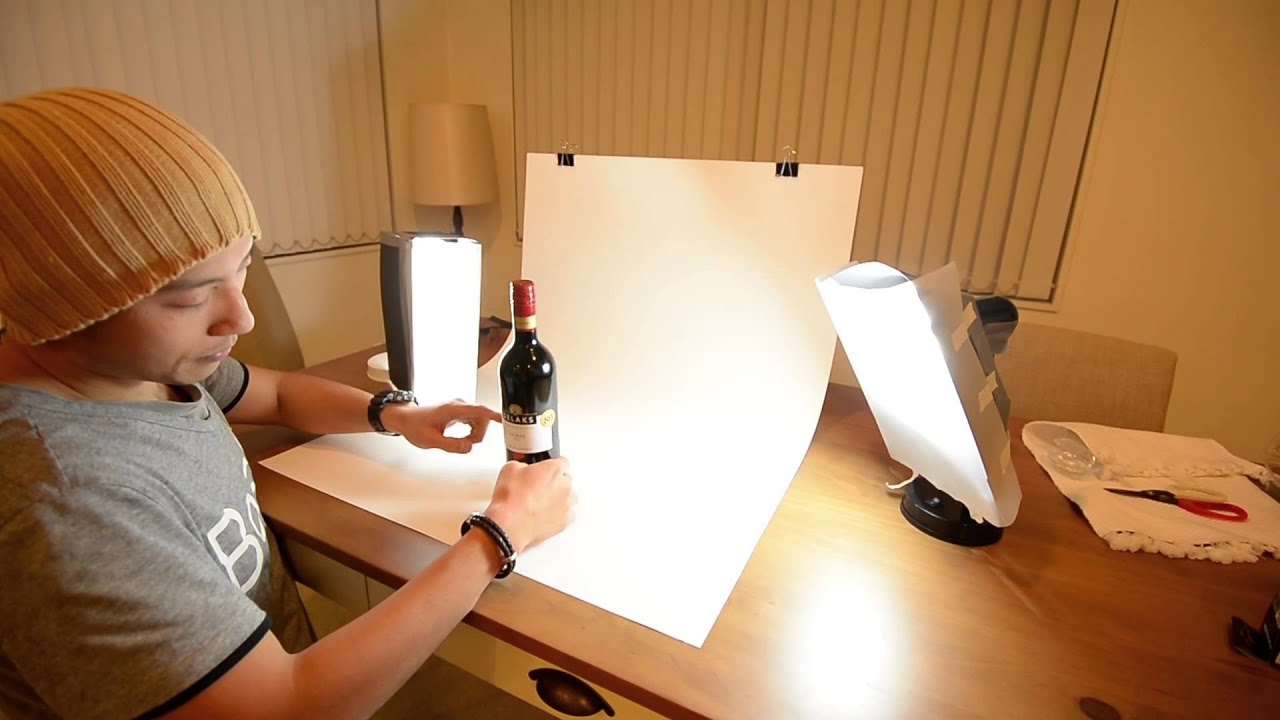
Are you looking to get creative with your product photography set up? Building your own DIY desktop product photography table can be a fun and cost-effective solution. Here's a step-by-step guide:
Firstly, gather your materials. You'll need a large piece of cardboard or foam board, a box cutter or scissors, and some white paper or fabric to cover the board. Secondly, cut a hole into the center of the board that is the size of your camera lens. Thirdly, cover the board with the white paper or fabric and smooth out any wrinkles. Finally, place your products on the board and experiment with lighting to get the best shots.
How to make Product Photographs that sell
Tips and Techniques for Capturing High-Quality Product Shots
If you're looking to create product photos that really sell your products, there are some key tips and techniques to keep in mind. Firstly, make sure your photos are sharp and in focus. This will ensure that potential customers can see the details and quality of your products.
Secondly, consider using a plain, neutral background. This will make your products really stand out and can create a professional and cohesive look to your product shots. Thirdly, use a tripod to keep your shots steady and reduce any blurring. Finally, experiment with lighting to create different moods and highlight different features of your products.
Professional Product Photography Setup : Product photography is an
The Benefits of a Professional Product Photography Setup
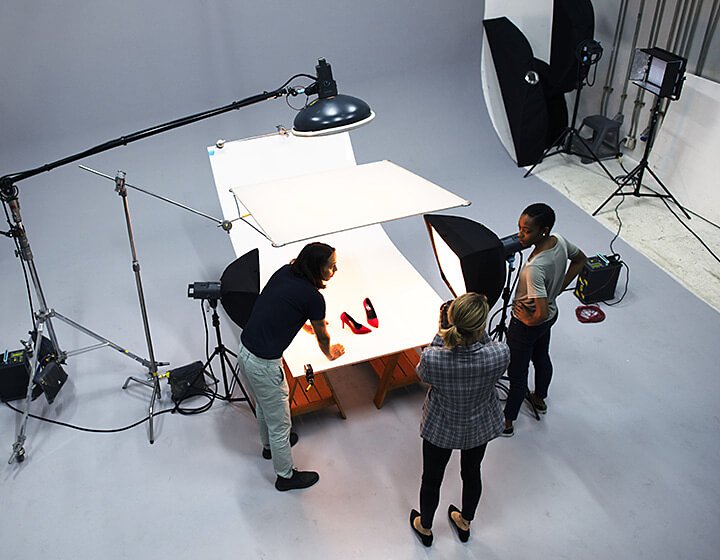
While it's definitely possible to take great product photos yourself, there are some real benefits to using a professional photography setup. Firstly, a professional setup will have a better camera and lighting equipment, which can result in higher quality and more consistent photos. Secondly, a professional photographer will have experience in setting up shots, choosing the right angles and lighting, and editing the final shots to make sure they look their best.
Finally, using a professional setup can save you time and hassle in the long run. When you're running a business, it can be hard to find the time to take perfect product photos on your own, especially if you're not familiar with the process. By using a professional photographer, you can ensure that your product photos are of the highest quality without taking away from other important aspects of your business.
What Lighting do you need for product photography? | Digi5studios Blog
Tips on Choosing the Right Lighting Setup for Your Product Photos
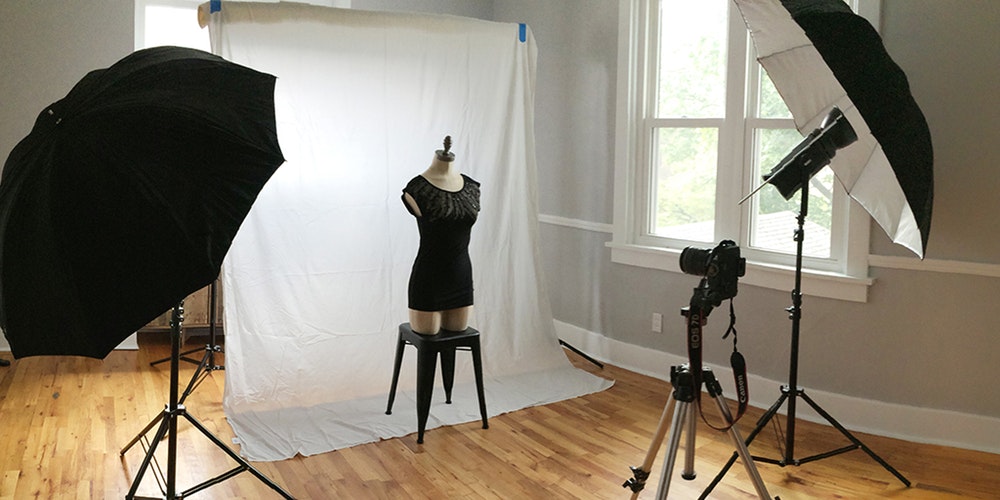
One of the most important things to consider when taking product photos is lighting. The right lighting can really make your products shine and can help to create the right mood for your shots. So what kind of lighting should you be using?
There are a few options to consider. Firstly, natural light can be a great option if you're shooting outside or near a large window. Natural light can create a soft and flattering look to your photos. Secondly, you might consider investing in some artificial lighting such as softbox lights, ring lights, or umbrellas. These can be adjusted to create the right level of brightness, warmth, and direction for your photos. Finally, you could also consider using reflectors or diffusers to balance and soften the light as needed.
Choosing the right lighting setup depends on the specific look and feel you're trying to achieve, but experimenting with different options can really help you to find the perfect balance for your product photography.
Find more articles about Set Up For Product Photography
Post a Comment for "Set Up For Product Photography"